Tweaker Setup
Now that you have downloaded and installed PSO2:NGS, this section of the guide will cover the various features of the PSO2 Tweaker as well as updating the game using the PSO2 Tweaker, provided by Arks-Layer.
Downloading the Tweaker
After PSO2:NGS has been successfully installed, you will need to update the game by using the PSO2 Tweaker. Failure to do so will result in being unable to login and not being able to create your character.
First, we'll need to ensure that the requirements for the PSO2 Tweaker are met. You will need to have the .NET Framework 4.6.2 or later installed. You can download the version 4.6.2 installer here.
If you have already ensured that you have .NET Framework 4.6.2 or higher installed, you can now continue with the download of the PSO2 Tweaker. Click here to visit the Arks-Layer page and download the PSO2 Tweaker by clicking on Download Link #1.

Once downloaded, place the tweaker into its own folder, preferably on either in your C: drive or another drive. and we will need to also set exceptions in our antivirus software. The reason for this is that most antivirus software use heuristics to identify possible unknown viruses, using certain patterns in behavior or how the program works. This means that the entire basis of how the Tweaker works gets it classified as a virus.
You may wonder, what does the Tweaker do to get it classified as a virus? Well, let's look over in what the Tweaker does in the first place. The Tweaker is an alternative launcher for the Japanese online RPG Phantasy Star Online 2: New Genesis. It is used to download updates and offers more features with optional patches to enhance the user experience. The Tweaker contacts the Arks-Layer server to request these patches and downloads them into your game's folder.
The Tweaker also allows you to download fan translation patches, which the Tweaker adds into the game itself. It's these things that virus heuristics wrongfully assume that the Tweaker is a virus.
You will need to set exceptions for the game itself. NGS utilizes two anti-cheat software programs such as GameGuard and Wellbia (Xigncode3). These programs utilizes rootkit behavior to scan your running processes and files. You cannot disable or limit them in any way or form, as the game will close if it detects this.
Launching the Tweaker & Updating the game
Now, after setting exceptions in our antivirus software, open the Tweaker as administrator. You'll be greeted with a pop-up message similar to below, asking if you would like to open a guide on how to use the tweaker.

Click on "No" and you'll see another message asking if you have installed PSO2 already. If you've been following this guide, click on "Yes" and you'll be asked to search for the location to where you installed PSO2:NGS, for a folder named "pso2_bin".

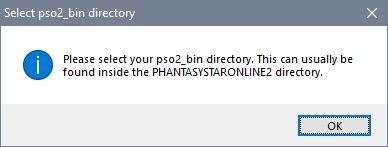
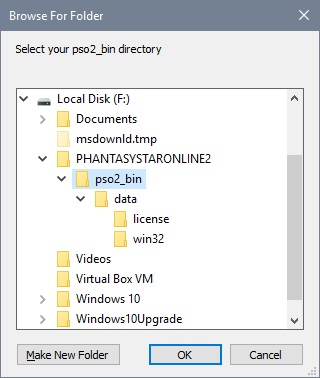
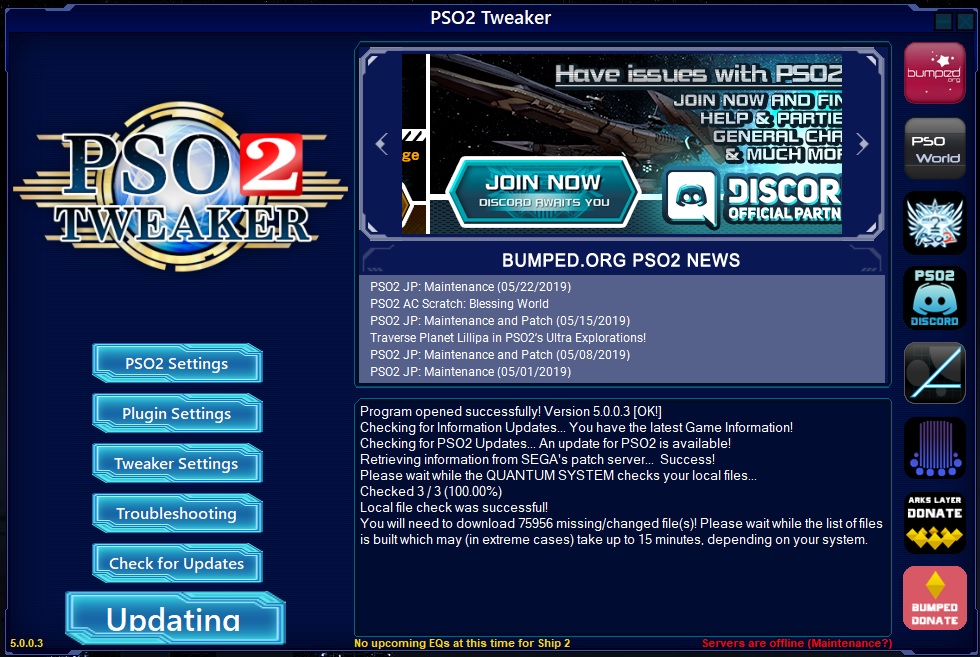
After searching for the location where you installed PSO2 and selected the pso2_bin folder, you'll be greeted with the main Tweaker window. It should then start the automatic file checking service in which the Tweaker will analyze your install and check which are out-of-date, then generate a list of files that it will need to download and update.
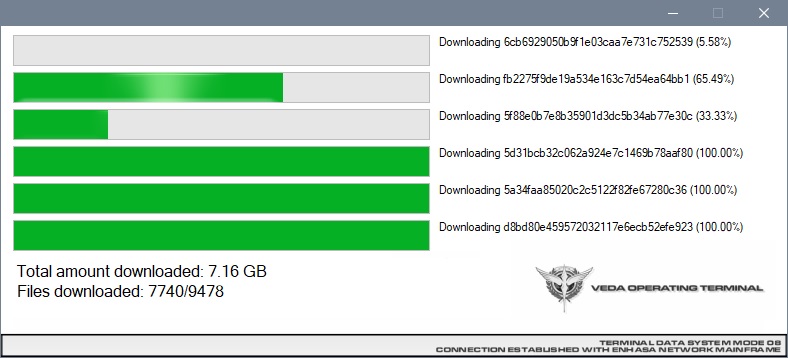
Once it has finished file checking, it will then move on to the updater. The Tweaker will now download the files it needs to update your game. The speed of this is determined by your CPU speed.
After you have successfully updated, whether you have installed the English patch or not, you may now play the game as is by clicking on "Start PSO2". However, there are more features that the PSO2 Tweaker can enable and install. If you wish to configure your graphics settings, click here to jump to the Graphics Configuration section of this guide.
Tweaker Plugins & Features
The PSO2 Tweaker offers extra add-on plugins that enhance the overall gaming experience for PSO2. Things such as an Item Translator, or a built-in proxy for those who are affected by the IP block.
To access these plugins, click on the button labeled "Plugin Settings" on the tweaker.
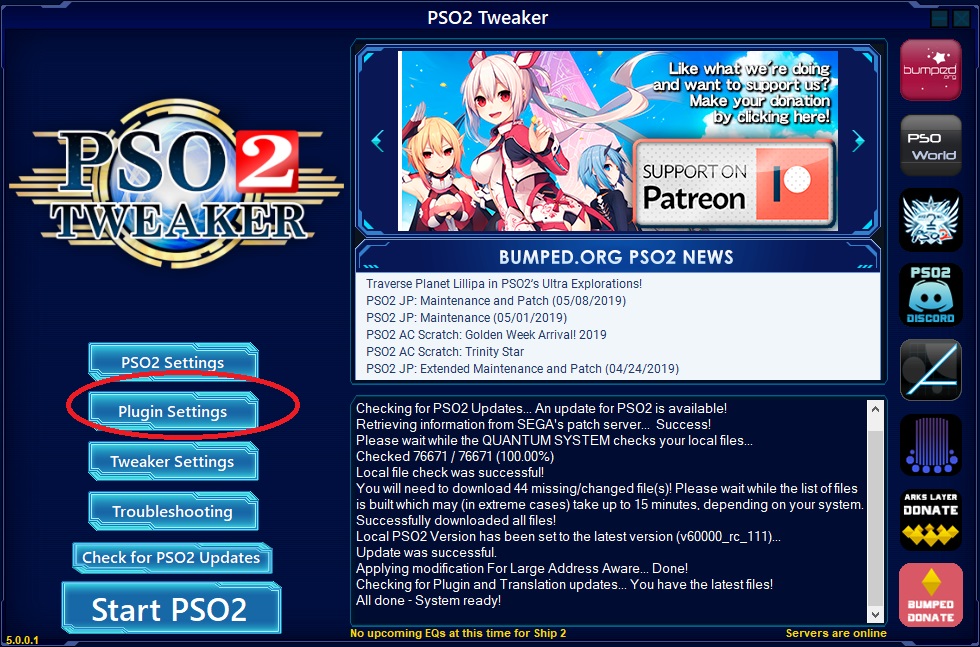
You will now be greeted by the Plugin Menu. A checked box means that the selected plugin has been enabled and an unchecked box means the plugin is disabled.
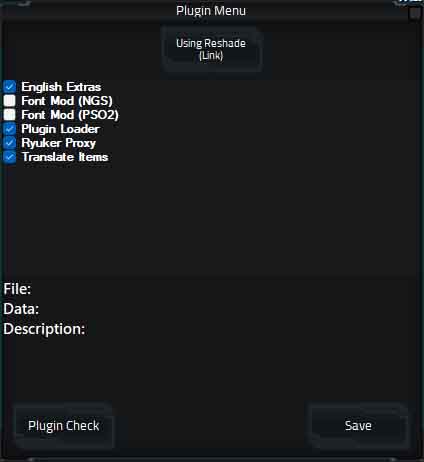
The Proxy Plugin, Item Translation Plugin, Plugin Loader are disabled by default.
If you're in a country that SEGA IP blocks, then you can enable the Proxy by enabling the Proxy Plugin.
Here is an overview of each plugin:
| # | Plugin | Description |
|---|---|---|
| 1 | English Extras | Provides a translation of specifc menus and screens not covered by the English fan translation patch. |
| 2 | Font Mod (NGS)/Font Mod (PSO2) |
Enables the use of non-english special characters used in other language patches.
The use of these plugins will cause various undesirable issues on the English translation patch and thus it is
strongly recommended that you disable these plugins if you're using the English translation patch.
|
| 3 | Plugin Loader | This is the bread and butter of the entire plugin system. It's required to use all plugins and they will not work if this plugin itself is not enabled. |
| 4 | Ryuker Proxy | This allows for users who are blocked by the IP Block, or other type of network interference (such as a country wide firewall or internet restriction). This proxy is optional to use and you are more than welcome to use your own VPN if you so desire. |
| 5 | Translate Items | This plugin allows for the translation of the various in-game items you may encounter and use. The English patch only handles the in-game text, but the items aren't handled by the patch. Due to a bug with how items are loaded, the plugin doesn't work reliably while playing PSO2 (Classic). |
After selecting which plugins you wish to be enabled, click on the "Save" button to save your settings and close the menu. Clicking on the Plugin Check button will check for updates on all plugins.
Graphics Configuration
To configure the graphic settings for PSO2, click on the button labelled "PSO2 Settings".
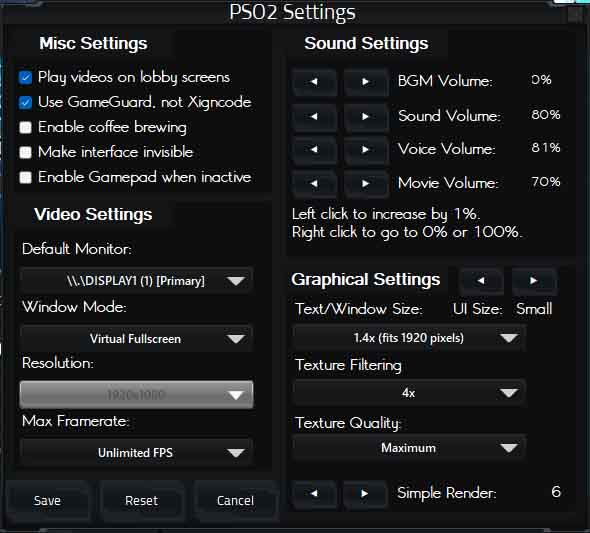
Unlike other games, PSO2 has different preset graphics options that enable and disable certain settings. These settings do not allow you to customize them completely, except for the post-processing settings that you can enable from within the game itself.
Below are the following overview of the different settings that can be configured in the PSO2 Settings menu:
- Misc Settings
-
- Play videos on lobby screens
- Displays whether the in-game video ads in the lobbies play video or not.
- Use GameGuard, not Xigncode
- Check to enable the use of nProtect GameGuard instead of Wellbia Xigncode.
- Enable Coffee Brewing
- See here for demonstration.
- Make interface invisible (Deprecated)
- Disables the game interface completely.
- Video Settings
-
- Default Monitor
- Selects the default monitor that the game will display on. Based on Windows defaults.
- Window Mode
- Select whether you want Fullscreen, Virtual Fullscreen (Borderless Window), or Windowed mode.
- Game Resolution
- Select your preferred game resolution. Virtual Fullscreen ignores this and goes for the maximum supported resolution based on the primary screen set configured by Windows.
- Max Framerate
- Set your preferred max framerate as supported by your screen. You can even choose unlimited which functions the same as vsync disabled.
- Text Size (Only affects Classic)
-
- This changes the scaling of the UI in-game. It's recommended that you don't touch this unless you have a smaller screen resolution lower than 1280x720. The higher the UI resolution, the smaller the UI will be. A custom setting can be selected if you manually edited the configuration file. (user.pso2)
- Simple Render Setting (Only affects Classic)
-
- PSO2 Classic uses different setting presets to display different graphic configurations. To play on low settings, with everything disabled, slide the slider down to 1. Maximum settings can be set by sliding the setting to 6, while medium settings can be achieved by selecting setting 3.
- Texture Quality (Only affects Classic)
-
- Setting enables the quality of your shaders. Simple shaders disables all post processing effects, Standard is the default setting, while High Resolution displays all post processing effects. Standard and High Quality shaders also allow for them to be toggled on/off in-game. Simple disables this ability.
- Texture Resolution (Only affects Classic)
-
- Selecting your texture quality determines how your in-game textures look. Compressed is good for very low end machines, Standard is the default, and High Resolution allows for a very near HD feel.
- Audio Settings
-
- BGM Volume
- This slider lets you set the desired volume of the in-game music and concerts.
- SE Volume
- This slider lets you set the desired volume of the general sound effects.
- Voice Volume
- This slider lets you set the desired volume of the voices your character and other characters in-game.
- Movie Volume
- This slider lets you set the desired volume of the video ads in-game.
Once you have configured your desired settings, click on "Save Changes" to exit this menu.
Wrapping Up
Congratulations, you have successfully installed PSO2 and you are now ready to play the game. Check out our (Arks-Layer) Discord server located here. If this guide helped you, be sure to tell us!
If you encounter any issues, be sure to visit the Arks-Layer Discord Server located here:
https://discord.gg/pso2 and join the channel #jp-tech-support
if you're having issues relating to GameGuard/Wellbia or weird in-game issues, or if you're having issues
with the PSO2 Tweaker itself. Be patient however, everyone there is a volunteer and not paid or sponsored by SEGA
in any way, shape or form.
If you encounter an issue (untranslated item/dialog box, possible weird translation) with the translation, also join the Discord and
report said issue to the #translation-reporting channel.